
14 min reading time
The endoscopy test for small intestinal bacterial overgrowth
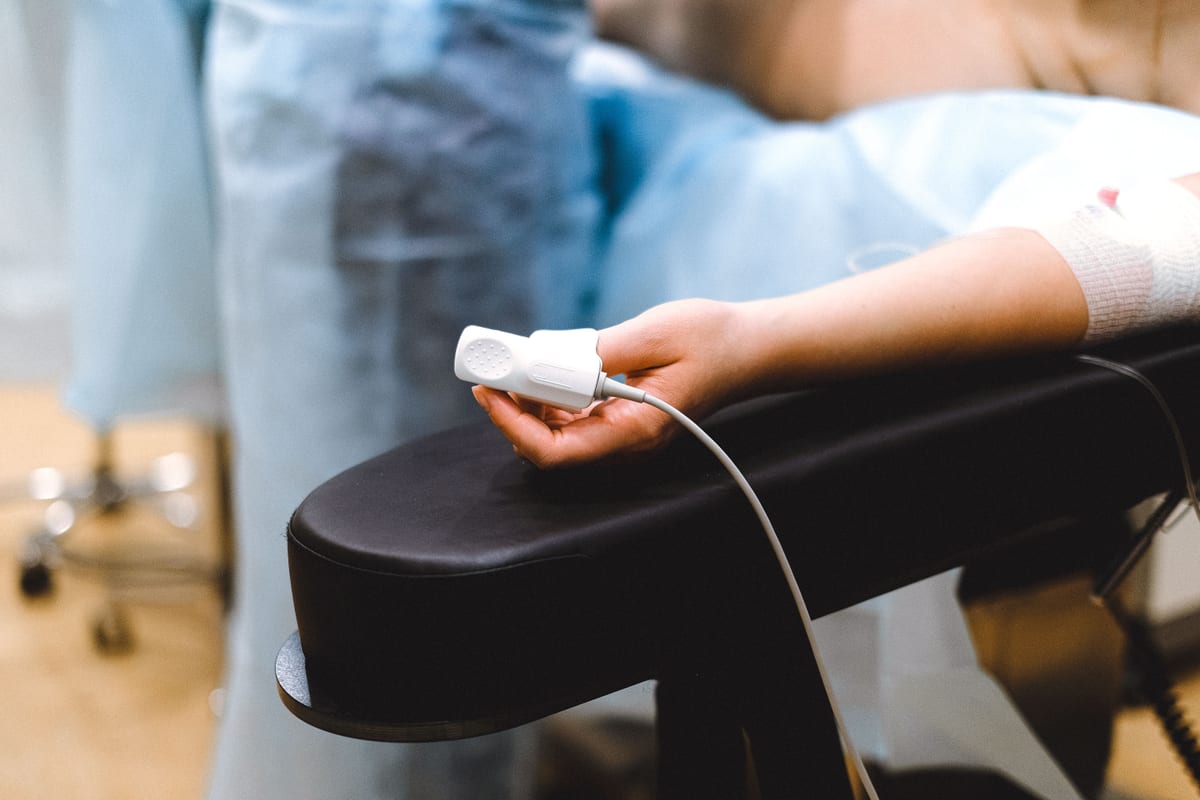
The endoscopy test is a medical procedure used to obtain fluid directly from the inside of the small intestine. Medical professionals send this fluid to a laboratory to count and identify the bacteria living inside the digestive tract. Doctors and medical researchers consider this physical collection method the most accurate way to measure bacterial populations in the small intestine1. In a clinical setting, this test is formally called a small bowel aspirate and fluid culture4.
The human gastrointestinal tract has different zones with different amounts of bacteria. The stomach and the upper sections of the small intestine normally contain very few bacteria because stomach acid and digestive enzymes destroy them2. The large intestine contains trillions of bacteria. When an abnormal number of bacteria grow in the upper sections of the small intestine, it causes physical symptoms. The endoscopy test physically pulls fluid from these upper sections so that medical professionals can measure the exact bacterial concentration and identify the specific bacterial species2.
Anatomical target of the test
The small intestine is a continuous tube that measures about 20 feet in length. It is divided into three sections. The first section is the duodenum, which connects directly to the stomach. The second section is the jejunum, and the third section is the ileum.
The endoscopy test primarily targets the duodenum. Historically, doctors performed the test by collecting fluid from the jejunum6. Modern clinical practices have shifted to the duodenum because it is much easier to reach with standard medical equipment. During a modern test, the doctor maneuvers the equipment into the third or fourth portion of the duodenum9. This deep placement ensures the fluid collection happens past the area where stomach acids immediately mix with food.
Equipment used for fluid collection
The procedure requires specific medical equipment to collect the fluid safely. The primary tool is an upper endoscope. An upper endoscope is a long, flexible tube that has a light and a camera on the end. It allows the doctor to see the inside of the digestive tract on a video monitor. The endoscope contains a hollow tube running through its center. This hollow tube is the biopsy channel. The biopsy channel allows the doctor to push other specialized tools into the intestine.
The doctor uses a long, thin plastic tube called a catheter to collect the fluid. The catheter slides down the inside of the biopsy channel and emerges into the intestine. Several different catheter designs are used for this specific test.
One standard tool is the 6 French Liguory catheter. The term “6 French” refers to the diameter of the tube, which is about 2 millimeters10. The Liguory catheter has multiple small side holes located at its tip5. These side holes allow the catheter to pull in fluid from multiple angles. This design prevents the soft tissue of the intestine from blocking a single suction hole at the very end of the tube.
Another specialized tool is a custom-designed double-lumen sterile aspiration catheter. Companies such as Hobbs Medical manufacture these specific devices8. A double-lumen catheter has an inner tube surrounded by an outer tube. The outer tube has a protective cap on the end made from sterile bone wax8. The bone wax seals the inner tube and protects it from the outside environment. The medical team keeps the inner tube sealed inside the outer tube while the endoscope travels through the mouth and stomach. Once the endoscope reaches the target location in the duodenum, the doctor pushes the inner tube forward. The inner tube breaks through the bone wax cap8. This mechanical action ensures that the inner collection tube only touches the environment of the duodenum.
The medical procedure
The patient stops eating and drinking for 8 to 12 hours before the endoscopy test14. This fasting period ensures the stomach and small intestine are empty of food particles. Food particles can block the catheter and interfere with the laboratory analysis.
The medical staff prepare the equipment using strict aseptic techniques to prevent bacteria from the hospital room from entering the samples5. The staff wear sterile gloves when handling the catheters5. The endoscope is kept inside a sterile wrap until the procedure begins5. The medical team flushes the inside of the endoscope with sterile water to remove any lingering contaminants5.
The doctor passes the endoscope through the patient’s mouth, down the esophagus, and through the stomach. The doctor then guides the endoscope through the pyloric sphincter and into the duodenum. Doctors often pump air into the digestive tract during endoscopies to inflate the organs and see the walls clearly. During a fluid collection test, the doctor uses minimal air insufflation5. Using too much air can blow stomach fluid down into the duodenum and alter the bacterial population in the test area5.
Once the endoscope is positioned in the third or fourth section of the duodenum, the medical staff remove their gloves and put on a new set of sterile gloves5. The doctor passes the collection catheter into the biopsy channel. The doctor uses a short plastic overtube to cover the biopsy valve on the endoscope. This overtube prevents the catheter from touching the outer valve mechanism5.
A medical assistant manages the physical collection of the fluid. The assistant connects a sterile 5-milliliter syringe to the outside end of the catheter5. The syringe connects to the catheter using a three-way stopcock5. The assistant sits down so that gravity can help pull the fluid down the long tube5. The assistant pulls back on the syringe plunger to create gentle, intermittent suction10.
The goal is to collect between 2 and 5 milliliters of luminal fluid1. The fluid in the duodenum is a mixture of intestinal secretions, pancreatic enzymes, and bile. The collected fluid is typically stained yellow or green by the bile5.
Sometimes the inside of the duodenum is completely dry, and the syringe cannot pull any fluid. When the intestine is dry, the medical staff gently massage the external skin over the patient’s liver5. The liver sits above the stomach and produces bile. Massaging the liver forces bile to flow down the bile ducts and into the duodenum. This physical action provides enough fluid for the catheter to suction5.
The fluid collection process takes between 2 and 5 minutes to complete5. Once the syringe contains enough fluid, the assistant disconnects the syringe from the stopcock. The assistant places a sterile cap over the tip of the syringe5. The sealed syringe goes into a plastic biohazard bag. The medical staff immediately transport the bag to the microbiology laboratory5.
Laboratory processing and mucus breakdown
The microbiology laboratory processes the fluid immediately to keep the bacteria alive. Intestinal fluid is very thick. It contains thick mucus that clumps the bacterial cells together. The lab technicians must liquefy this mucus to count the bacteria accurately.
The technicians add a chemical compound called dithiothreitol to the fluid13. Dithiothreitol is a mucolytic agent. This means it breaks the chemical bonds that hold mucus molecules together18. The laboratory mixes equal parts of sterile dithiothreitol and the intestinal fluid13. The technicians place the mixture into a vortex machine5. The vortex machine spins the tube rapidly for about 30 seconds13. The spinning motion and the dithiothreitol chemical turn the thick mucus into a thin liquid13.
The laboratory technician then takes 100 microliters of the liquefied mixture. The technician dilutes this sample using 900 microliters of a sterile saltwater solution called phosphate-buffered saline17. This step creates a 1-to-10 dilution. The technician repeats this process to create a 1-to-100 dilution17. Diluting the fluid ensures that the bacterial colonies spread out evenly on the testing plates. If the fluid is not diluted, the bacteria grow into one large mass that is impossible to count.
Agar plating and bacterial growth
The technicians place the diluted fluid onto agar plates1. Agar is a jelly-like substance that provides a physical structure and chemical nutrients for bacteria to grow. The laboratory uses two specific types of agar for this test: MacConkey agar and blood agar1.
MacConkey agar is designed to grow aerobic bacteria. Aerobic bacteria are bacteria that require oxygen to survive17. MacConkey agar contains specific salts and dyes that stop certain types of bacteria from growing16. This allows the lab to separate and grow only gram-negative bacteria. The lab specifically looks for a group of gram-negative bacteria called coliforms, which belong to the Enterobacteriaceae family16.
Blood agar contains actual mammalian blood. It is a rich nutrient base that supports the growth of a very wide variety of bacteria16. In this test, blood agar is used to grow anaerobic bacteria. Anaerobic bacteria are bacteria that cannot survive in oxygen17.
The lab technicians place the MacConkey agar plates into an incubator17. The incubator is a warm box filled with normal air that stays at exactly 37 degrees Celsius17. The plates remain in the incubator for 16 to 18 hours17.
The technicians place the blood agar plates into specialized rectangular containers called anaerobic jars17. The lab puts a chemical packet, such as a Mitsubishi AnaeroPack, into the jar and seals the lid17. The chemical packet absorbs all the oxygen inside the jar and replaces it with carbon dioxide. The anaerobic jars go into an incubator at 37 degrees Celsius for 16 to 18 hours5.
If the technicians do not see any bacterial growth after 18 hours, they leave the plates in the incubators for an additional 24 hours17. Once the bacteria grow into visible dots, the technicians count them. Each dot represents a single bacterial cell from the original fluid that multiplied into a cluster. These dots are called colony-forming units. The technicians place the agar plates into an electronic scanning machine, such as the Scan 50017. The electronic machine counts the colony-forming units and calculates the final concentration of bacteria in the intestinal fluid.
Diagnostic thresholds and bacterial counts
The result of the endoscopy test is reported as colony-forming units per milliliter. This measurement is abbreviated as CFU/mL2. Medical guidelines use a specific numerical threshold to determine if the bacterial count is abnormally high.
Historically, doctors defined a positive test as a bacterial count greater than or equal to 10^5 CFU/mL14. The number 10^5 represents 100,000 colony-forming units per milliliter. This standard originated from medical studies that analyzed patients who had undergone specific abdominal surgeries, such as a gastric bypass or a colectomy. These surgeries physically altered the digestive tracts and created blind loops where massive amounts of bacteria could pool and grow4.
Over time, researchers tested the fluid from healthy people with normal intestinal anatomy. The data showed that healthy human duodenums almost never contain bacterial concentrations that reach 100,000 CFU/mL21. Because of this new data, modern gastroenterology organizations changed the diagnostic threshold.
The American College of Gastroenterology and the North American Consensus guidelines currently define a positive test as a bacterial count greater than or equal to 10^3 CFU/mL14. The number 10^3 represents 1,000 colony-forming units per milliliter. The Asian-Pacific consensus guidelines acknowledge the debate over these numbers and support the use of both the 10^3 and 10^5 diagnostic thresholds depending on the exact patient history21.
The choice of agar plate influences the 10^3 threshold. Clinical studies analyzed the differences between the bacterial counts on MacConkey agar versus blood agar. The data revealed that crossing the 1,000 CFU/mL threshold on MacConkey agar correlates directly with severe disruptions in the overall bacterial environment25. When the coliform bacteria count hits 1,000 CFU/mL on the MacConkey plate, the total diversity of the bacterial community in the small intestine drops25. This mathematical relationship identifies the exact tipping point where the normal bacterial network breaks down. The total bacterial count on the blood agar plates does not show this same clear relationship25. Researchers identify the 1,000 CFU/mL count on MacConkey agar as the specific mathematical indicator for the condition25.
| Diagnostic guideline | Fluid source | Diagnostic threshold | Primary bacterial target |
|---|---|---|---|
| Historical standard | Jejunal aspirate | ≥ 10^5 CFU/mL | Total bacterial count |
| American College of Gastroenterology | Duodenal aspirate | ≥ 10^3 CFU/mL | Aerobic gram-negative bacteria |
| North American Consensus | Duodenal aspirate | ≥ 10^3 CFU/mL | Coliforms on MacConkey agar |
Specific bacterial markers
The endoscopy test identifies the exact types of bacteria causing the overgrowth. In a healthy small intestine, the most common bacteria belong to a group called Firmicutes8. When an overgrowth occurs, the ratio of bacteria shifts completely. A positive test reveals a massive increase in a different group of bacteria called Proteobacteria15. Data shows that fluid from a positive test contains a 3-fold to 6-fold higher concentration of Proteobacteria compared to fluid from a healthy intestine8.
Within the Proteobacteria group, the overgrowth is dominated by a specific family of bacteria called Enterobacteriaceae16. The laboratory cultures primarily isolate two distinct species from this family: Escherichia coli and Klebsiella9. Escherichia coli and Klebsiella are coliform bacteria20. Genetic analysis reveals that a very small number of specific Escherichia coli strains and Klebsiella species can account for more than 40 percent of all the bacteria in the duodenum during an overgrowth event26.
Advanced genetic sequencing
Traditional agar plates cannot grow every type of bacteria. Some bacterial species die immediately upon contact with the air in the laboratory. Other species require very specific chemical nutrients that the standard agar plates lack. To identify these unculturable bacteria, advanced laboratories analyze the fluid using genetic testing methods.
After the technicians put the fluid on the agar plates, they place the remaining intestinal fluid into a centrifuge17. The centrifuge spins the tube at a speed that generates 17,000 times the force of gravity17. The machine spins the fluid for 10 minutes17. The extreme gravitational force pushes all the bacterial cells to the very bottom of the tube. The cells form a solid mass called a pellet17.
The technician removes the extra liquid from the top of the tube. The technician then adds 500 microliters of a chemical called All Protect reagent to the pellet17. This reagent stabilizes the cells and prevents the bacterial DNA from breaking down over time17. The pellet is then placed in a specialized freezer that stays at negative 80 degrees Celsius17.
When the laboratory is ready to perform the genetic analysis, they extract the DNA from the frozen pellet17. The lab uses a technology called 16S ribosomal RNA gene sequencing15. This technology scans the genetic material and reads the specific DNA codes that identify different bacterial species. The lab also uses shotgun sequencing, which reads all the genetic material in the sample simultaneously24.
Genetic sequencing reveals that processing the fluid with the dithiothreitol chemical increases the detection of specific anaerobic bacteria16. Sequencing shows higher concentrations of the Clostridium, Enterococcus, Fusobacterium, and Bacteroides bacteria in samples treated with the mucus-breaking chemical16. These specific bacteria live deep inside the mucus layer that coats the intestinal walls. The genetic data confirms that the chemical successfully dissolves the mucus and frees these bacteria for analysis16.
Physical limitations of the test
The endoscopy test presents several physical and technical limitations. The primary limitation is the invasive nature of the collection process1. The procedure requires the patient to undergo medical sedation. Inserting a long medical instrument into the digestive tract carries inherent physical risks and increases the financial cost of the diagnosis1.
The test is highly susceptible to cross-contamination. The endoscope must travel through the mouth, throat, and stomach before reaching the duodenum6. The human mouth contains high concentrations of bacteria. The endoscope can easily push saliva or stomach fluid into the sterile testing zone. If the catheter collects this displaced fluid, the laboratory will grow bacteria from the mouth rather than the intestine6. Clinical data shows that approximately 20 percent of positive endoscopy tests are the result of contamination from mouth or skin bacteria12. The use of the sterile bone wax cap reduces this risk, but contamination remains a common technical failure12.
The anatomy of the human body limits the scope of the test. The small intestine is 20 feet long. The endoscope only reaches the first few feet of the duodenum8. Bacterial overgrowth does not always spread evenly throughout the entire organ. The bacteria often grow in isolated patches21. If the abnormal bacteria pool in the lower sections of the intestine, the endoscope cannot reach them21. The laboratory will report a normal bacterial count because the fluid from the duodenum was healthy, even though the patient has an overgrowth deeper in the intestine21.
Finally, the natural defense mechanisms of the human body can interfere with the bacterial count. The stomach produces highly acidic digestive juices. The liver produces bile acids. The pancreas produces digestive enzymes. These fluids empty into the duodenum and destroy bacteria2. If the endoscope collects fluid immediately after a large release of bile or acid, the chemicals will kill the bacteria in the collection tube before the fluid reaches the laboratory2. This chemical interference results in an artificially low bacterial count on the agar plates.
Works Cited & Scientific References
30
▼
- Confusion in Breath Test for Diagnosing Bacterial Overgrowth in the Small Intestine
- Confusion in Breath Test for Diagnosing Bacterial Overgrowth in the Small Intestine
- Irritable bowel syndrome and small intestinal bacterial overgrowth
- Small Intestinal Bacterial Overgrowth: Clinical Features and Therapeutic Management
- Small Intestinal Bacterial Overgrowth: Clinical Features and Therapeutic Management
- Current and Future Approaches for Diagnosing Small Intestinal Dysbiosis in Patients With Symptoms of Functional Dyspepsia - Frontiers
- Diagnosis by Microbial Culture, Breath Tests and Urinary Excretion Tests, and Treatments of Small Intestinal Bacterial Overgrowth - MDPI
- The duodenal microbiome is altered in small intestinal bacterial overgrowth - Research journals - PLOS
- Prevalence of Small Intestinal Bacterial Overgrowth Syndrome in Patients with Non-Alcoholic Fatty Liver Disease/Non-Alcoholic Steatohepatitis: A Cross-Sectional Study - MDPI
- Small-bowel aspiration for SIBO | Download Scientific Diagram - ResearchGate
- Small-bowel aspiration during upper esophagogastroduodenoscopy: Rao technique - PMC
- Defining Small Intestinal Bacterial Overgrowth by Culture and High Throughput Sequencing - Darmzentrum Bern
- Characterization of the Small Bowel Microbiome Reveals Different Profiles in Human Subjects Who Are Overweight or Have Obesity - PMC
- DIAGNOSIS AND TREATMENT OF SMALL INTESTINAL BACTERIAL OVERGROWTH: AN OFFICIAL POSITION PAPER FROM THE BRAZILIAN FEDERATION OF GASTROENTEROLOGY - PMC
- The duodenal microbiome is altered in small intestinal bacterial overgrowth | PLOS One
- (PDF) Optimizing microbiome sequencing for small intestinal aspirates: Validation of novel techniques through the REIMAGINE study - ResearchGate
- The duodenal microbiome is altered in small intestinal bacterial overgrowth - PMC - NIH
- Alpha diversity indices of DA samples pre-treated with DTT (DA-DTT, N =... - ResearchGate
- Full article: The duodenal microbiota is compartmentalized and clinically stable yet rapidly responsive to nutrient exposure
- S1313 The First Advanced Network Analysis of the Small Bowel Microbiome in Small Intestinal Bacterial Overgrowth (SIBO) Reveals That Escherichia and Klebsiella Are Disruptive to Network Integrity: Data From the REIMAGINE Study - Lippincott
- Understanding Our Tests: Hydrogen-Methane Breath Testing to Diagnose Small Intestinal Bacterial Overgrowth - PMC
- Diagnosing Small Intestinal Bacterial Overgrowth (SIBO) - BetterByDesign Nutrition Ltd.
- Dietary and Medical Management of Small-Intestinal Bacterial Overgrowth: A Narrative Review - MDPI
- Defining Small Intestinal Bacterial Overgrowth by Culture and High Throughput Sequencing | Request PDF - ResearchGate
- INCREASED COLIFORMS IN THE SMALL BOWEL ARE A SIGNATURE OF PATIENTS... - Leite G - May 8 2023 - DDW ePoster
- Defining Small Intestinal Bacterial Overgrowth by Culture and High Throughput Sequencing - PubMed
- Current and Future Approaches for Diagnosing Small Intestinal Dysbiosis in Patients With Symptoms of Functional Dyspepsia - Frontiers
- Characterization of the Small Bowel Microbiome Reveals Different Profiles in Human Subjects Who Are Overweight or Have Obesity - ResearchGate
- Characterization of Proximal Small Intestinal Microbiota in Patients
- Duodenal microbiome changes in postmenopausal women: effects of hormone therapy and implications for cardiovascular risk - PMC
Topics & Tags:
Continue Learning
Related SIBO Guides